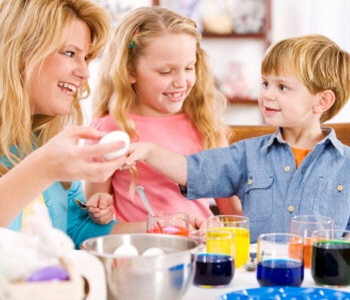
Crack up with your family this Easter as you dye and decorate the most important symbol of spring: the egg! There are hundreds of ways to deck out your eggs, and they usually start with a decals, crayons and dye. Think outside-the-basket this season by using one of these fun egg decorating methods:
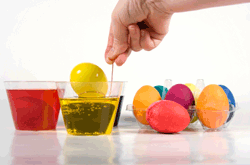
The most common process in egg decorating is dyeing hard boiled chicken eggs using vinegar, water and food coloring.  Of course, there are also egg coloring kits you can buy at your local grocery store if you prefer a simpler set-up. But all it takes is the three ingredients listed prior, and a tablespoon and container such as an empty margarine tub to dye your eggs in. Fill the container about half-way with water, add a teaspoon of vinegar and then add as many drops of food coloring that it takes to create your desired color. When the dye is ready, place the egg in the tub full of dye using the spoon and leave it in for two minutes or as long as ten depending on how dark you want your egg. If you're going for a pastel look, only a minute or two is necessary. If messy dye is not your style, there are simpler ways to color eggs that won't result in stained clothes. Try simply soaking your eggs in water, wrapping them in colorful tissue paper, and then after letting them sit, un-wrap them to reveal a colorful marbled look.
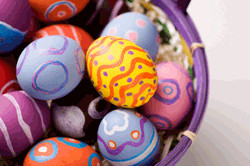
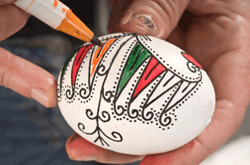
Decorating Easter eggs is the most interesting and important step in making them a work of art before diving into the dyeing process. Some popular techniques include using clear crayons, markers, paint or wax to write your name or draw pretty designs on your Easter eggs before dipping them in the dye.  Most of these materials can be found at the supermarket, a craft store or even around the house. Using hot wax to paint flowers and other designs on eggs is a popular Easter decorating custom in Poland, but children should be supervised if they want to participate in this craft. To try this method, start by blowing out the egg yolk through two small holes poked with a pin through the center. Then, dip the non-pointy end of the pin in melted wax and paint designs on the egg. This should be done fairly quickly before the wax dries and while also being very careful not to burn yourself. After the design has dried, you can color the egg by dipping it in dye.
In addition, decals, stickers and decoupage are great ways to create fancy egg masterpieces with little effort.  Try decorating eggs using Easter-themed stickers with the kids and then dyeing them in a matching color. Also, decoupage can be just as fun to do with the family in the days leading up to Easter. Though a little more complicated than stickers, this process will result in a fancier, more polished-looking egg. All you need is some Easter wrapping paper, a hollowed-out egg, glue and water based polyurethane purchased from an art or hardware store to use with parental supervision if the kids want to try. Start by gluing wrapping paper cut-outs onto the egg, followed by a coating of watered-down glue painted over it. Then after letting the egg dry for an hour or longer, coat the egg with the water based polyurethane to seal in the design, wait to dry again, and you've got a beautiful decoupage egg perfect for the Easter bunny to hide in the yard!.

About Birthday Party Ideas | Privacy Policy | Contact Us
BirthdayPartyIdeas.com - Birthday party ideas to help you plan your kids birthday party celebration.
NutcrackerBallet.net - Nutcracker information, performance directory and ballet reviews.
www.Bashions.com
.
